Покращення класифікації ознак за допомогою проєкційних квантових ядер
Оцінка використання: 80 хвилин на процесорі Heron r3 (ПРИМІТКА: Це лише оцінка. Твій час виконання може відрізнятися.)
Результати навчання
Після проходження цього навчального посібника користувачі повинні розуміти:
- Як працюють проєкційні квантові ядра (PQK) і коли вони пропонують потенційну квантову перевагу.
- Як запустити PQK на реальному обладнанні з використанням реального набору даних.
Передумови
Ми рекомендуємо, щоб користувачі були ознайомлені з такими темами перед проходженням цього навчального посібника:
- Квантові ядра з курсу квантового машинного навчання в IBM Quantum® Learning
Загальні відомості
У цьому навчальному посібнику ми демонструємо, як запустити проєкційне квантове ядро (PQK) з Qiskit на реальному біологічному наборі даних, на основі статті Enhanced Prediction of CAR T-Cell Cytotoxicity with Quantum-Kernel Methods [1].
PQK — це метод, що використовується в квантовому машинному навчанні (QML) для кодування класичних даних у квантовий простір ознак та їх проєкції назад у класичну область, за допомогою квантових комп'ютерів для покращення вибору ознак. Він включає кодування класичних даних у квантові стани за допомогою квантової схеми, зазвичай через процес, що називається відображенням ознак, де дані перетворюються у багатовимірний простір Гільберта. "Проєкційний" аспект відноситься до вилучення класичної інформації з квантових станів шляхом вимірювання конкретних спостережуваних величин, для побудови матриці ядра, яку можна використовувати в класичних алгоритмах на основі ядер, таких як метод опорних векторів. Цей підхід використовує обчислювальні переваги квантових систем для потенційного досягнення кращої продуктивності на певних завданнях порівняно з класичними методами.
Основними будівельними блоками PQK є зведені матриці густини (RDM), отримані через проєктивні вимірювання квантової карти ознак. Зокрема, зазвичай обчислюються однокубітні зведені матриці густини (1-RDM) для кожного кубіту. Ці виміряні величини потім використовуються як вхідні дані для класичної функції ядра, такої як експоненціальне ядро, для побудови кінцевої матриці ядра.
PQK пропонують потенційні переваги перед стандартними квантовими ядрами, особливо для близькочасового квантового обладнання. Стандартні квантові ядра зазвичай покладаються на оцінку глобальних перекриттів станів, що стає дедалі складнішим для точного вимірювання зі збільшенням кількості кубітів і є дуже чутливим до шуму. На відміну від цього, PQK використовують локальні спостережувані величини, такі як однокубітні зведені матриці густини (1-RDM), що призводить до меншої потреби у вибірках, покращеної стійкості до апаратного шуму та кращої масштабованості. Проєктуючи квантові стани на локальні вимірювальні ознаки перед застосуванням класичної функції ядра, PQK можуть зберегти корисні квантові кореляції, залишаючись при цьому більш практичними для близькочасових пристроїв.
Вимоги
Перед початком цього навчального посібника переконайся, що у тебе встановлено наступне:
- Qiskit SDK v2.0 або пізніше, з підтримкою visualization
- Qiskit Runtime v0.40 або пізніше (
pip install qiskit-ibm-runtime) - Category encoders 2.8.1 (
pip install category-encoders) - NumPy 2.3.2 (
pip install numpy) - Pandas 2.3.2 (
pip install pandas) - Scikit-learn 1.7.1 (
pip install scikit-learn) - Tqdm 4.67.1 (
pip install tqdm)
Налаштування
# Added by doQumentation — required packages for this notebook
!pip install -q category-encoders numpy pandas qiskit qiskit-ibm-runtime scipy scikit-learn tqdm
import warnings

# Standard libraries
import os
import numpy as np
import pandas as pd

# Machine learning and data processing
import category_encoders as ce
from scipy.linalg import inv, sqrtm
from sklearn.metrics.pairwise import rbf_kernel
from sklearn.model_selection import GridSearchCV, StratifiedKFold
from sklearn.svm import SVC

# Qiskit and Qiskit Runtime
from qiskit import QuantumCircuit
from qiskit.circuit import ParameterVector
from qiskit.circuit.library import UnitaryGate, ZZFeatureMap
from qiskit.quantum_info import SparsePauliOp, random_unitary
from qiskit.transpiler import generate_preset_pass_manager
from qiskit_ibm_runtime import (
    Batch,
    EstimatorOptions,
    EstimatorV2 as Estimator,
    QiskitRuntimeService,
)

# Progress bar
import tqdm

warnings.filterwarnings("ignore")
Приклад на малих масштабах з симулятором
Ми опускаємо приклад на малих масштабах з симулятором у цьому навчальному посібнику, оскільки нашою основною метою є демонстрація того, як проєкційні квантові ядра можуть масштабуватися до більших систем і реального обладнання.
Приклад на великих масштабах на реальному обладнанні
Крок 1: Відображення класичних входів на квантову задачу
Підготовка набору даних
У цьому навчальному посібнику ми використовуємо реальний біологічний набір даних для завдання бінарної класифікації, який згенеровано Daniels et al. (2022) і можна завантажити з supplementary material, включеного до статті. Дані складаються з CAR T-клітин, які є генетично модифікованими T-клітинами, що використовуються в імунотерапії для лікування певних видів раку. T-клітини, тип імунних клітин, модифікуються в лабораторії для експресії химерних антигенних рецепторів (CAR), які націлені на специфічні білки на ракових клітинах. Ці модифіковані T-клітини можуть розпізнавати і знищувати ракові клітини більш ефективно. Ознаками даних є мотиви CAR T-клітин, які відносяться до специфічного структурного або функціонального компонента CAR, вбудованого в T-клітини. На основі цих мотивів наше завдання полягає в тому, щоб передбачити цитотоксичність даної CAR T-клітини, позначаючи її як токсичну або нетоксичну. Нижче наведено допоміжні функції для попередньої обробки цього набору даних.
def preprocess_data(dir_root, args):
    """
    Preprocess the training and test data.
    """
    # Read from the csv files
    train_data = pd.read_csv(
        os.path.join(dir_root, args["file_train_data"]),
        encoding="unicode_escape",
        sep=",",
    )
    test_data = pd.read_csv(
        os.path.join(dir_root, args["file_test_data"]),
        encoding="unicode_escape",
        sep=",",
    )

    # Fix the last motif ID
    train_data[train_data == 17] = 14
    train_data.columns = [
        "Cell Number",
        "motif",
        "motif.1",
        "motif.2",
        "motif.3",
        "motif.4",
        "Nalm 6 Cytotoxicity",
    ]
    test_data[test_data == 17] = 14
    test_data.columns = [
        "Cell Number",
        "motif",
        "motif.1",
        "motif.2",
        "motif.3",
        "motif.4",
        "Nalm 6 Cytotoxicity",
    ]

    # Adjust motif at the third position
    if args["filter_for_spacer_motif_third_position"]:
        train_data = train_data[
            (train_data["motif.2"] == 14) | (train_data["motif.2"] == 0)
        ]
        test_data = test_data[
            (test_data["motif.2"] == 14) | (test_data["motif.2"] == 0)
        ]

    train_data = train_data[
        args["motifs_to_use"] + [args["label_name"], "Cell Number"]
    ]
    test_data = test_data[
        args["motifs_to_use"] + [args["label_name"], "Cell Number"]
    ]

    # Adjust motif at the last position
    if not args["allow_spacer_motif_last_position"]:
        last_motif = args["motifs_to_use"][len(args["motifs_to_use"]) - 1]
        train_data = train_data[
            (train_data[last_motif] != 14) & (train_data[last_motif] != 0)
        ]
        test_data = test_data[
            (test_data[last_motif] != 14) & (test_data[last_motif] != 0)
        ]

    # Get the labels
    train_labels = np.array(train_data[args["label_name"]])
    test_labels = np.array(test_data[args["label_name"]])

    # For the classification task use the threshold to binarize labels
    train_labels[train_labels > args["label_binarization_threshold"]] = 1
    train_labels[train_labels < 1] = args["min_label_value"]
    test_labels[test_labels > args["label_binarization_threshold"]] = 1
    test_labels[test_labels < 1] = args["min_label_value"]

    # Reduce data to just the motifs of interest
    train_data = train_data[args["motifs_to_use"]]
    test_data = test_data[args["motifs_to_use"]]

    # Get the class and motif counts
    min_class = np.min(np.unique(np.concatenate([train_data, test_data])))
    max_class = np.max(np.unique(np.concatenate([train_data, test_data])))

    num_class = max_class - min_class + 1
    num_motifs = len(args["motifs_to_use"])
    print(str(max_class) + ":" + str(min_class) + ":" + str(num_class))

    train_data = train_data - min_class
    test_data = test_data - min_class

    return (
        train_data,
        test_data,
        train_labels,
        test_labels,
        num_class,
        num_motifs,
    )

def data_encoder(args, train_data, test_data, num_class, num_motifs):
    """
    Use one-hot or binary encoding for classical data representation.
    """
    if args["encoder"] == "one-hot":
        # Transform to one-hot encoding
        train_data = np.eye(num_class)[train_data]
        test_data = np.eye(num_class)[test_data]

        train_data = train_data.reshape(
            train_data.shape[0], train_data.shape[1] * train_data.shape[2]
        )
        test_data = test_data.reshape(
            test_data.shape[0], test_data.shape[1] * test_data.shape[2]
        )

    elif args["encoder"] == "binary":
        # Transform to binary encoding
        encoder = ce.BinaryEncoder()

        base_array = np.unique(np.concatenate([train_data, test_data]))
        base = pd.DataFrame(base_array).astype("category")
        base.columns = ["motif"]
        for motif_name in args["motifs_to_use"][1:]:
            base[motif_name] = base.loc[:, "motif"]
        encoder.fit(base)

        train_data = encoder.transform(train_data.astype("category"))
        test_data = encoder.transform(test_data.astype("category"))

        train_data = np.reshape(
            train_data.values, (train_data.shape[0], num_motifs, -1)
        )
        test_data = np.reshape(
            test_data.values, (test_data.shape[0], num_motifs, -1)
        )

        train_data = train_data.reshape(
            train_data.shape[0], train_data.shape[1] * train_data.shape[2]
        )
        test_data = test_data.reshape(
            test_data.shape[0], test_data.shape[1] * test_data.shape[2]
        )

    else:
        raise ValueError("Invalid encoding type.")

    return train_data, test_data
Ти можеш запустити цей навчальний посібник, виконавши наступну комірку, яка автоматично створює необхідну структуру папок і завантажує як навчальні, так і тестові файли безпосередньо у твоє середовище. Якщо у тебе вже є ці файли локально, цей крок безпечно перезапише їх, щоб забезпечити узгодженість версій.
## Download dataset

# Create data directory if it doesn't exist
!mkdir -p data_tutorial/pqk

# Download the training and test sets from the official Qiskit documentation repo
!wget -q --show-progress -O data_tutorial/pqk/train_data.csv \
  https://raw.githubusercontent.com/Qiskit/documentation/main/datasets/tutorials/pqk/train_data.csv

!wget -q --show-progress -O data_tutorial/pqk/test_data.csv \
  https://raw.githubusercontent.com/Qiskit/documentation/main/datasets/tutorials/pqk/test_data.csv

!wget -q --show-progress -O data_tutorial/pqk/projections_train.csv \
  https://raw.githubusercontent.com/Qiskit/documentation/main/datasets/tutorials/pqk/projections_train.csv

!wget -q --show-progress -O data_tutorial/pqk/projections_test.csv \
  https://raw.githubusercontent.com/Qiskit/documentation/main/datasets/tutorials/pqk/projections_test.csv

# Check the files have been downloaded
!echo "Dataset files downloaded:"
!ls -lh data_tutorial/pqk/*.csv
args = {
    "file_train_data": "train_data.csv",
    "file_test_data": "test_data.csv",
    "motifs_to_use": ["motif", "motif.1", "motif.2", "motif.3"],
    "label_name": "Nalm 6 Cytotoxicity",
    "label_binarization_threshold": 0.62,
    "filter_for_spacer_motif_third_position": False,
    "allow_spacer_motif_last_position": True,
    "min_label_value": -1,
    "encoder": "one-hot",
}
dir_root = "./"

# Preprocess data
train_data, test_data, train_labels, test_labels, num_class, num_motifs = (
    preprocess_data(dir_root=dir_root, args=args)
)

# Encode the data
train_data, test_data = data_encoder(
    args, train_data, test_data, num_class, num_motifs
)
14:0:15
Ми також перетворюємо набір даних таким чином, що представлено як для цілей масштабування.
# Change 1 to pi/2
angle = np.pi / 2

tmp = pd.DataFrame(train_data).astype("float64")
tmp[tmp == 1] = angle
train_data = tmp.values

tmp = pd.DataFrame(test_data).astype("float64")
tmp[tmp == 1] = angle
test_data = tmp.values
Ми перевіряємо розміри та форми навчальних і тестових наборів даних.
print(train_data.shape, train_labels.shape)
print(test_data.shape, test_labels.shape)
(172, 60) (172,)
(74, 60) (74,)
Крок 2: Оптимізація задачі для виконання на квантовому обладнанні
Квантова схема
Тепер ми конструюємо карту ознак, яка вбудовує наш класичний набір даних у простір ознак вищої розмірності. Для цього вбудовування ми використовуємо ZZFeatureMap з Qiskit.
feature_dimension = train_data.shape[1]
reps = 24
insert_barriers = True
entanglement = "pairwise"

# ZZFeatureMap with linear entanglement and a repetition of 2
embed = ZZFeatureMap(
    feature_dimension=feature_dimension,
    reps=reps,
    entanglement=entanglement,
    insert_barriers=insert_barriers,
    name="ZZFeatureMap",
)
embed.decompose().draw(output="mpl", style="iqp", fold=-1)

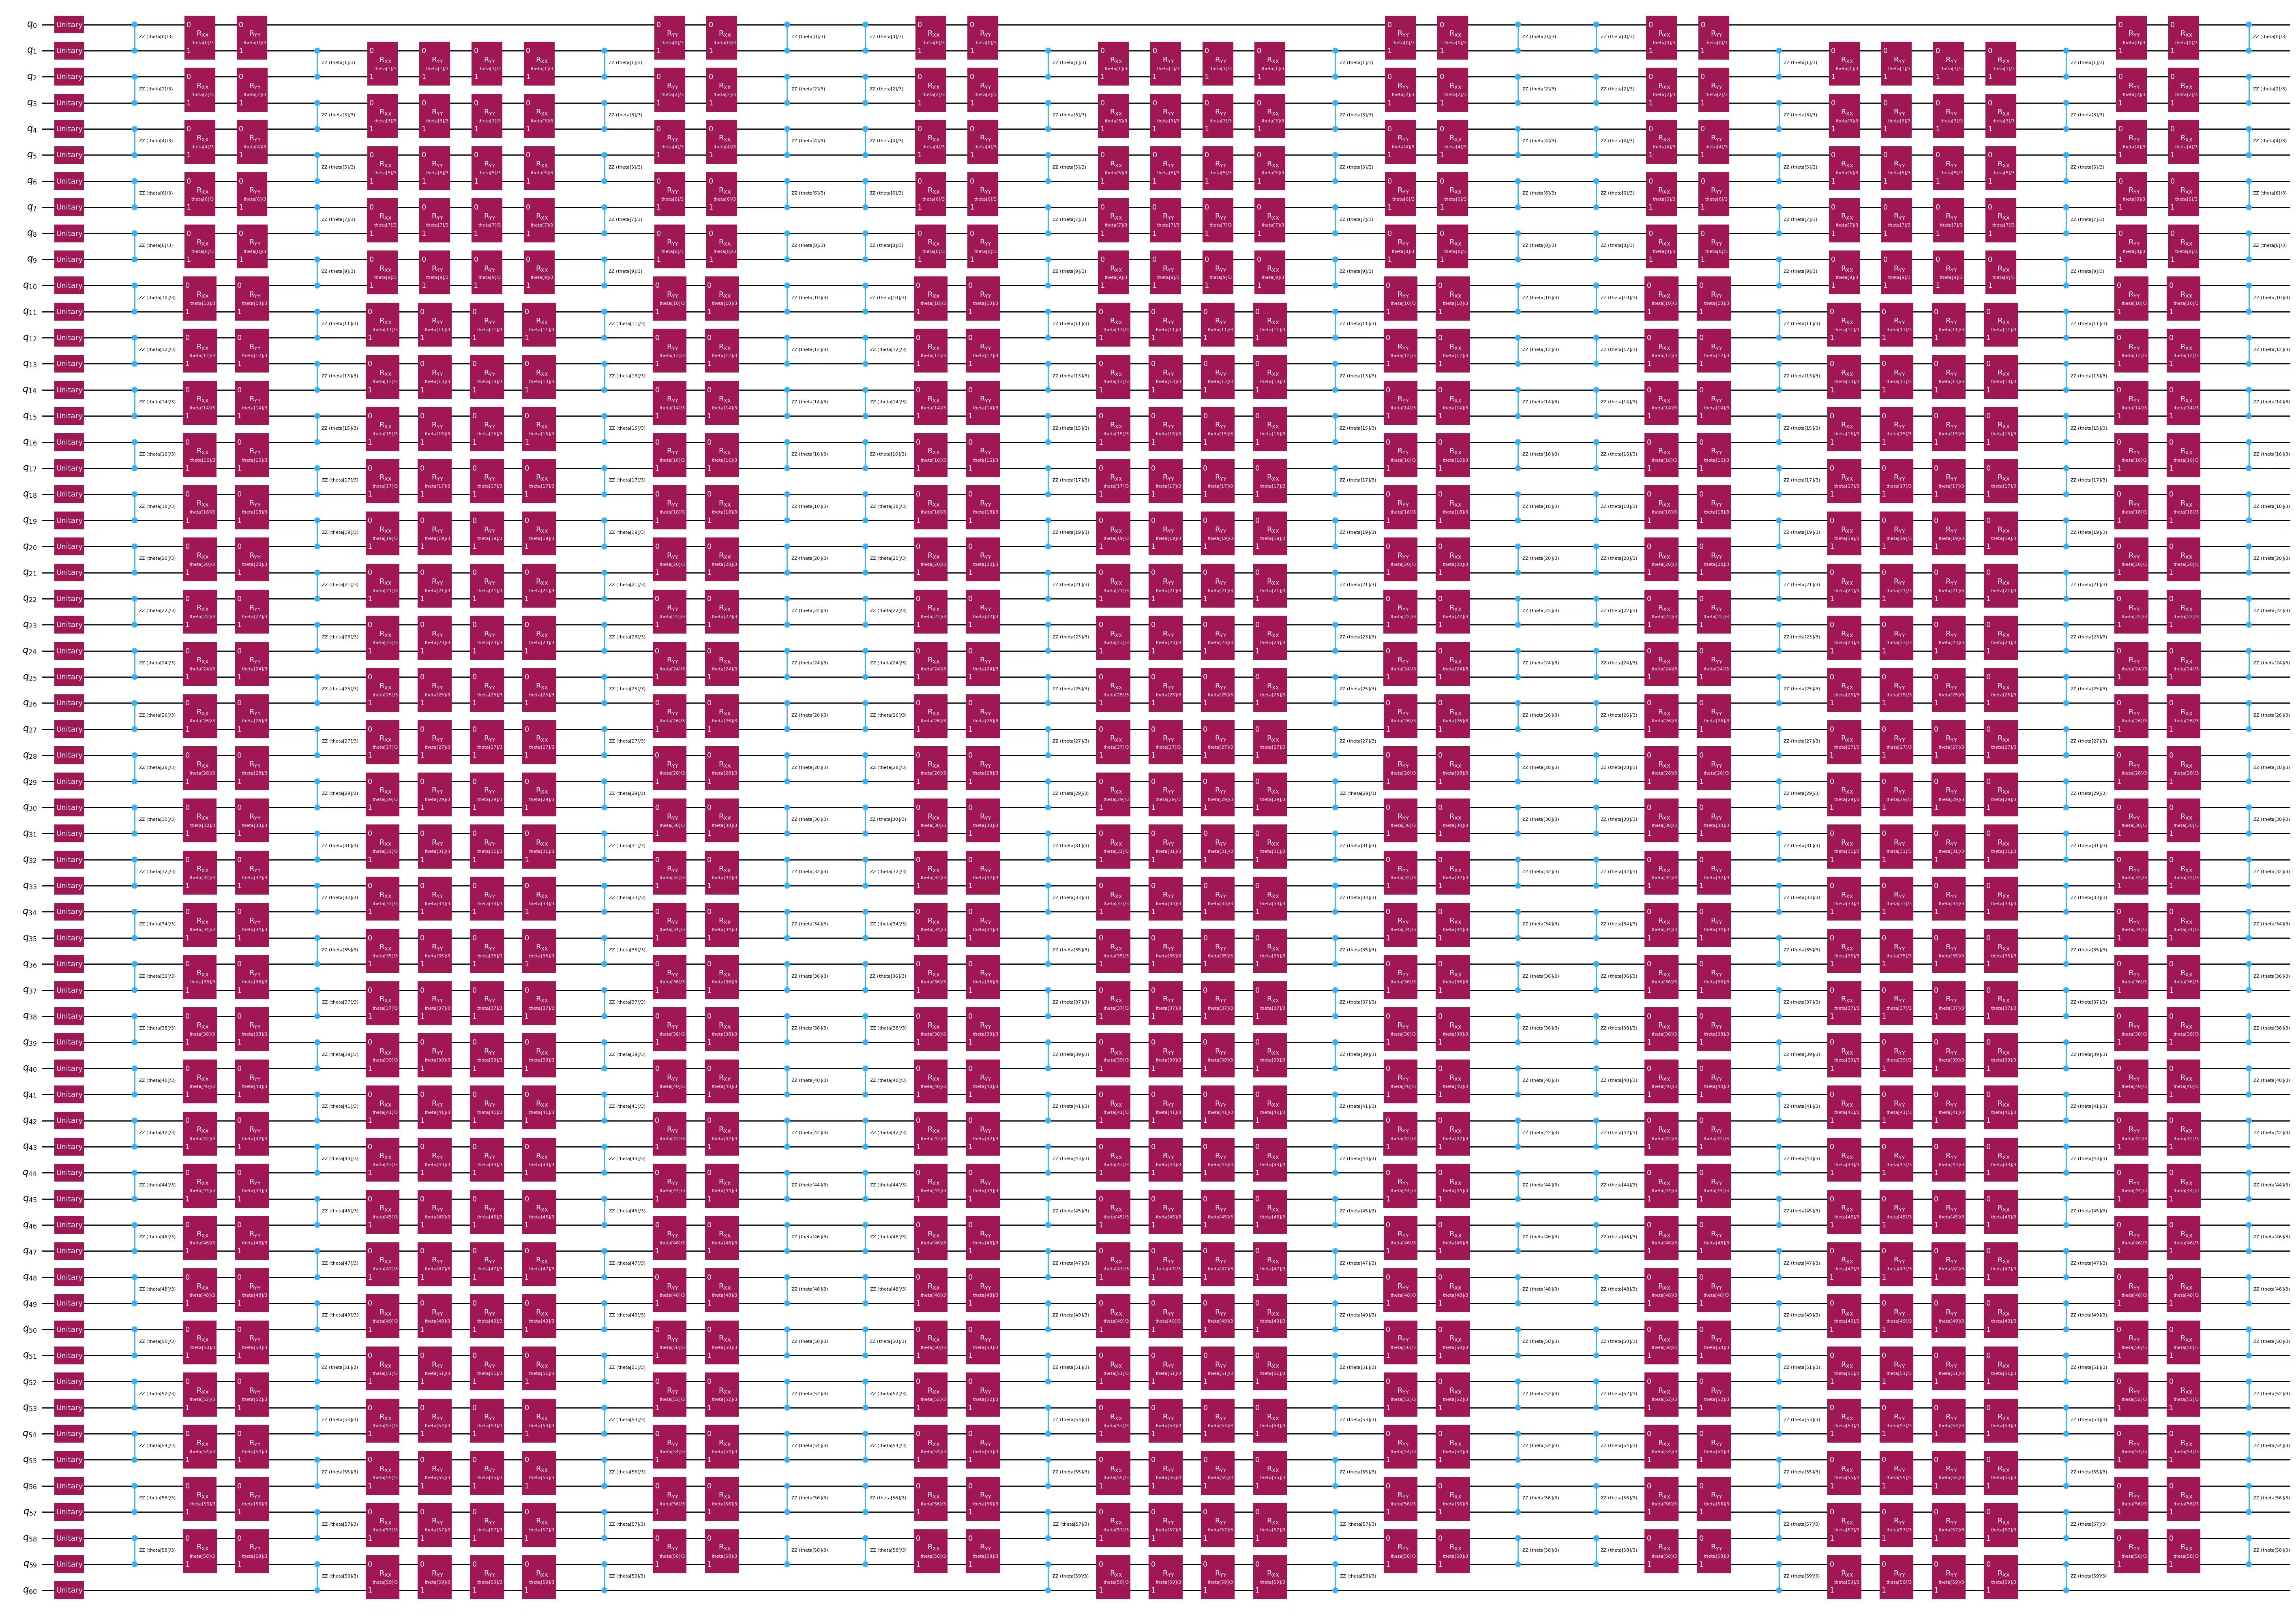
Іншим варіантом квантового вбудовування є ансатц еволюції гамільтоніану 1D-Heisenberg. Ти можеш пропустити виконання цього розділу, якщо хочеш продовжити з ZZFeatureMap.
feature_dimension = train_data.shape[1]
num_qubits = feature_dimension + 1
embed2 = QuantumCircuit(num_qubits)
num_trotter_steps = 6
pv_length = feature_dimension * num_trotter_steps
pv = ParameterVector("theta", pv_length)

# Add Haar random single qubit unitary to each qubit as initial state
np.random.seed(42)
seeds_unitary = np.random.randint(0, 100, num_qubits)
for i in range(num_qubits):
    rand_gate = UnitaryGate(random_unitary(2, seed=seeds_unitary[i]))
    embed2.append(rand_gate, [i])

def trotter_circ(feature_dimension, num_trotter_steps):
    num_qubits = feature_dimension + 1
    circ = QuantumCircuit(num_qubits)
    # Even
    for i in range(0, feature_dimension, 2):
        circ.rzz(2 * pv[i] / num_trotter_steps, i, i + 1)
    for i in range(0, feature_dimension, 2):
        circ.rxx(2 * pv[i] / num_trotter_steps, i, i + 1)
    for i in range(0, feature_dimension, 2):
        circ.ryy(2 * pv[i] / num_trotter_steps, i, i + 1)
    # Odd
    for i in range(1, feature_dimension, 2):
        circ.rzz(2 * pv[i] / num_trotter_steps, i, i + 1)
    for i in range(1, feature_dimension, 2):
        circ.rxx(2 * pv[i] / num_trotter_steps, i, i + 1)
    for i in range(1, feature_dimension, 2):
        circ.ryy(2 * pv[i] / num_trotter_steps, i, i + 1)
    return circ

# Hamiltonian evolution ansatz
for step in range(num_trotter_steps):
    circ = trotter_circ(feature_dimension, num_trotter_steps)
    if step % 2 == 0:
        embed2 = embed2.compose(circ)
    else:
        reverse_circ = circ.reverse_ops()
        embed2 = embed2.compose(reverse_circ)

embed2.draw(output="mpl", style="iqp", fold=-1)
Крок 3: Виконання за допомогою примітивів Qiskit
Вимірювання 1-RDM
На цьому кроці ми отримуємо всі однокубітні зведені матриці густини (1-RDM) через проєктивні вимірювання квантової карти ознак, які пізніше будуть передані в класичну експоненціальну функцію ядра.
Давай подивимося, як обчислити 1-RDM для однієї точки даних з набору даних, перш ніж ми запустимо обробку всіх даних. 1-RDM є набором однокубітних вимірювань операторів Паулі X, Y і Z на всіх кубітах. Це тому, що однокубітна RDM може бути повністю виражена як:
Спочатку ми обираємо бекенд для використання.
service = QiskitRuntimeService()
backend = service.least_busy(
    operational=True, simulator=False, min_num_qubits=133
)
target = backend.target
Потім ми запускаємо квантову схему і вимірюємо проєкції. Зверни увагу, що ми вмикаємо пом'якшення помилок, включаючи екстраполяцію з нульовим шумом (ZNE).
# Let's select the ZZFeatureMap embedding for this example
qc = embed
num_qubits = feature_dimension

# Identity operator on all qubits
id = "I" * num_qubits

# Let's select the first training datapoint as an example
parameters = train_data[0]

# Bind parameter to the circuit and simplify it
qc_bound = qc.assign_parameters(parameters)
transpiler = generate_preset_pass_manager(
    optimization_level=3, basis_gates=["u3", "cz"]
)
transpiled_circuit = transpiler.run(qc_bound)

# Transpile for hardware
transpiler = generate_preset_pass_manager(optimization_level=3, target=target)
transpiled_circuit = transpiler.run(transpiled_circuit)

# We group all commuting observables
# These groups are the Pauli X, Y and Z operators on individual qubits
observables_x = [
    SparsePauliOp(id[:i] + "X" + id[(i + 1) :]).apply_layout(
        transpiled_circuit.layout
    )
    for i in range(num_qubits)
]
observables_y = [
    SparsePauliOp(id[:i] + "Y" + id[(i + 1) :]).apply_layout(
        transpiled_circuit.layout
    )
    for i in range(num_qubits)
]
observables_z = [
    SparsePauliOp(id[:i] + "Z" + id[(i + 1) :]).apply_layout(
        transpiled_circuit.layout
    )
    for i in range(num_qubits)
]

# We define the primitive unified blocs (PUBs) consisting of the embedding circuit,
# set of observables and the circuit parameters
pub_x = (transpiled_circuit, observables_x)
pub_y = (transpiled_circuit, observables_y)
pub_z = (transpiled_circuit, observables_z)

# Experiment options for error mitigation
num_randomizations = 300
shots_per_randomization = 100
noise_factors = [1, 3, 5]

experimental_opts = {}
experimental_opts["resilience"] = {
    "measure_mitigation": True,
    "zne_mitigation": True,
    "zne": {
        "noise_factors": noise_factors,
        "amplifier": "gate_folding",
        "extrapolated_noise_factors": [0] + noise_factors,
    },
}
experimental_opts["twirling"] = {
    "num_randomizations": num_randomizations,
    "shots_per_randomization": shots_per_randomization,
    "strategy": "active-accum",
}

# We define and run the estimator to obtain <X>, <Y> and <Z> on all qubits
estimator = Estimator(mode=backend, options=experimental_opts)

job = estimator.run([pub_x, pub_y, pub_z])
Далі ми отримуємо результати.
job_result_x = job.result()[0].data.evs
job_result_y = job.result()[1].data.evs
job_result_z = job.result()[2].data.evs
print(job_result_x)
print(job_result_y)
print(job_result_z)
[ 3.67865951e-03  1.01158571e-02 -3.95790878e-02  6.33984326e-03
  1.86035759e-02 -2.91533268e-02 -1.06374793e-01  4.48873518e-18
  4.70201764e-02  3.53997968e-02  2.53130819e-02  3.23903401e-02
  6.06327843e-03  1.16313667e-02 -1.12387504e-02 -3.18457725e-02
 -4.16445718e-04 -1.45609602e-03 -4.21737114e-01  2.83705669e-02
  6.91332890e-03 -7.45363001e-02 -1.20139326e-02 -8.85566135e-02
 -3.22648394e-02 -3.24228074e-02  6.20431299e-04  3.04225434e-03
  5.72795792e-03  1.11288428e-02  1.50395861e-01  9.18380197e-02
  1.02553163e-01  2.98312847e-02 -3.30298912e-01 -1.13979648e-01
  4.49159340e-03  8.63861493e-02  3.05666566e-02  2.21463145e-04
  1.45946735e-02  8.54537275e-03 -8.09805979e-02 -2.92608104e-02
 -3.91243644e-02 -3.96632760e-02 -1.41187613e-01 -1.07363243e-01
  1.81089440e-02  2.70778895e-02  1.45139414e-02  2.99480458e-02
  4.99137134e-02  7.08789852e-02  4.30565759e-02  8.71287156e-02
  1.04334798e-01  7.72191962e-02  7.10059720e-02  1.04650403e-01]
[-7.31765102e-05  7.42669174e-03  9.82277344e-03  5.92638249e-02
  4.24120486e-02 -9.06473416e-03  4.55057675e-03  8.43494094e-03
  6.92097339e-02 -6.82234424e-02  6.13509008e-02  3.94200491e-02
 -1.24037979e-02  1.01976642e-01  7.90538600e-03 -7.19726160e-02
 -1.19501703e-16 -1.03796614e-02  7.37382463e-02  1.97238568e-01
 -3.59250635e-02 -2.67554009e-02  3.55010633e-02  7.68877990e-02
  6.50677589e-05 -6.59298767e-03 -1.23719487e-02 -6.41938151e-02
  1.95603072e-02 -2.48448551e-02  5.17784810e-02 -5.93767100e-02
  3.11897681e-02 -3.91959720e-18 -4.47769148e-03  1.39202197e-01
 -6.56387523e-02 -5.85665483e-02  9.52905894e-03 -8.61460731e-02
  3.91790656e-02 -1.27544375e-01  1.63712244e-01  3.36816934e-04
  2.26230028e-02 -2.45023393e-05  4.95635588e-03  1.44779564e-01
  3.71625177e-02  3.65675948e-03  2.83694017e-02 -7.10500602e-02
 -1.15467702e-01  6.21712129e-03 -4.80958959e-02  2.21021066e-02
  7.99062499e-02 -1.87164076e-02 -3.67100369e-02 -2.38923731e-02]
[ 6.85871605e-01  5.07725024e-01  8.71024642e-03  3.34823455e-02
  4.58684961e-02  9.44384189e-17 -4.46829296e-02 -2.91296778e-02
  4.15466461e-02  2.89628330e-02  1.88624017e-03  5.37110446e-02
  2.59579053e-03  1.39327071e-02 -2.90781778e-02  5.07209866e-03
  5.83403000e-02  2.60764440e-02  4.45999706e-17 -6.66701417e-03
  3.03215873e-01  2.26172533e-02  2.43105960e-02  4.98861041e-18
 -2.45530791e-02  6.26940708e-02  1.21058073e-02  2.76675948e-04
  2.63980996e-02  2.58302364e-02  7.47856723e-02  8.42728943e-02
  5.70989097e-02  6.92955086e-02 -5.68313712e-03  1.32199452e-01
  8.90511238e-02 -3.45204621e-02 -1.05445836e-01  6.03864150e-03
  2.16291384e-02  8.22303162e-03  1.00856715e-02  6.28973151e-02
  6.26727169e-02  6.15399206e-02  9.67320897e-02  1.03045269e-16
  1.79688783e-01 -1.59960520e-02 -1.15422952e-02  9.60200470e-03
  6.58396672e-02  7.78329830e-03  6.53226955e-02  2.45778685e-03
  4.36694753e-03  5.75098762e-03 -2.48896201e-02  8.33740755e-05]
Ми виводимо розмір схеми та глибину двокубітних воріт.
print(f"qubits: {qc.num_qubits}")
print(
    f"2q-depth: {transpiled_circuit.depth(lambda x: x.operation.num_qubits==2)}"
)
print(
    f"2q-size: {transpiled_circuit.size(lambda x: x.operation.num_qubits==2)}"
)
print(f"Operator counts: {transpiled_circuit.count_ops()}")
transpiled_circuit.draw("mpl", fold=-1, style="clifford", idle_wires=False)
qubits: 60
2q-depth: 64
2q-size: 1888
Operator counts: OrderedDict({'rz': 6016, 'sx': 4576, 'cz': 1888, 'x': 896, 'barrier': 31})

Тепер ми можемо пройтися циклом по всьому навчальному набору даних, щоб отримати всі 1-RDM.
Ми також надаємо результати з експерименту, який ми запустили на квантовому обладнанні. Ти можеш або запустити навчання самостійно, встановивши прапорець нижче на True, або використати результати проєкцій, які ми надаємо.
# Set this to True if you want to run the training on hardware
run_experiment = False
# Identity operator on all qubits
id = "I" * num_qubits

# projections_train[i][j][k] will be the expectation value of the j-th
# Pauli operator (0: X, 1: Y, 2: Z) of datapoint i on qubit k
projections_train = []
jobs_train = []

# Experiment options for error mitigation
num_randomizations = 300
shots_per_randomization = 100
noise_factors = [1, 3, 5]

experimental_opts = {}
experimental_opts["resilience"] = {
    "measure_mitigation": True,
    "zne_mitigation": True,
    "zne": {
        "noise_factors": noise_factors,
        "amplifier": "gate_folding",
        "return_all_extrapolated": True,
        "return_unextrapolated": True,
        "extrapolated_noise_factors": [0] + noise_factors,
    },
}
experimental_opts["twirling"] = {
    "num_randomizations": num_randomizations,
    "shots_per_randomization": shots_per_randomization,
    "strategy": "active-accum",
}
options = EstimatorOptions(experimental=experimental_opts)

if run_experiment:
    with Batch(backend=backend):
        for i in tqdm.tqdm(
            range(len(train_data)), desc="Training data progress"
        ):
            # Get training sample
            parameters = train_data[i]

            # Bind parameter to the circuit and simplify it
            qc_bound = qc.assign_parameters(parameters)
            transpiler = generate_preset_pass_manager(
                optimization_level=3, basis_gates=["u3", "cz"]
            )
            transpiled_circuit = transpiler.run(qc_bound)

            # Transpile for hardware
            transpiler = generate_preset_pass_manager(
                optimization_level=3, target=target
            )
            transpiled_circuit = transpiler.run(transpiled_circuit)

            # We group all commuting observables
            # These groups are the Pauli X, Y and Z operators on individual qubits
            observables_x = [
                SparsePauliOp(id[:i] + "X" + id[(i + 1) :]).apply_layout(
                    transpiled_circuit.layout
                )
                for i in range(num_qubits)
            ]
            observables_y = [
                SparsePauliOp(id[:i] + "Y" + id[(i + 1) :]).apply_layout(
                    transpiled_circuit.layout
                )
                for i in range(num_qubits)
            ]
            observables_z = [
                SparsePauliOp(id[:i] + "Z" + id[(i + 1) :]).apply_layout(
                    transpiled_circuit.layout
                )
                for i in range(num_qubits)
            ]

            # We define the primitive unified blocs (PUBs) consisting
            # of the embedding circuit,
            # set of observables and the circuit parameters
            pub_x = (transpiled_circuit, observables_x)
            pub_y = (transpiled_circuit, observables_y)
            pub_z = (transpiled_circuit, observables_z)

            # We define and run the estimator to obtain <X>, <Y> and <Z>
            # on all qubits
            estimator = Estimator(options=options)

            job = estimator.run([pub_x, pub_y, pub_z])
            jobs_train.append(job)
Training data progress: 100%|██████████| 172/172 [13:03<00:00, 4.55s/it]
Після завершення робіт ми можемо отримати результати.
if run_experiment:
    for i in tqdm.tqdm(
        range(len(train_data)), desc="Retrieving training data results"
    ):
        # Completed job
        job = jobs_train[i]

        # Job results
        job_result_x = job.result()[0].data.evs
        job_result_y = job.result()[1].data.evs
        job_result_z = job.result()[2].data.evs

        # Record <X>, <Y> and <Z> on all qubits for the current datapoint
        projections_train.append([job_result_x, job_result_y, job_result_z])
Ми повторюємо це для тестового набору.
# Identity operator on all qubits
id = "I" * num_qubits

# projections_test[i][j][k] will be the expectation value of the
# j-th Pauli operator (0: X, 1: Y, 2: Z) of datapoint i on qubit k
projections_test = []
jobs_test = []

# Experiment options for error mitigation
num_randomizations = 300
shots_per_randomization = 100
noise_factors = [1, 3, 5]

experimental_opts = {}
experimental_opts["resilience"] = {
    "measure_mitigation": True,
    "zne_mitigation": True,
    "zne": {
        "noise_factors": noise_factors,
        "amplifier": "gate_folding",
        "return_all_extrapolated": True,
        "return_unextrapolated": True,
        "extrapolated_noise_factors": [0] + noise_factors,
    },
}
experimental_opts["twirling"] = {
    "num_randomizations": num_randomizations,
    "shots_per_randomization": shots_per_randomization,
    "strategy": "active-accum",
}
options = EstimatorOptions(experimental=experimental_opts)

if run_experiment:
    with Batch(backend=backend):
        for i in tqdm.tqdm(range(len(test_data)), desc="Test data progress"):
            # Get test sample
            parameters = test_data[i]

            # Bind parameter to the circuit and simplify it
            qc_bound = qc.assign_parameters(parameters)
            transpiler = generate_preset_pass_manager(
                optimization_level=3, basis_gates=["u3", "cz"]
            )
            transpiled_circuit = transpiler.run(qc_bound)

            # Transpile for hardware
            transpiler = generate_preset_pass_manager(
                optimization_level=3, target=target
            )
            transpiled_circuit = transpiler.run(transpiled_circuit)

            # We group all commuting observables
            # These groups are the Pauli X, Y and Z operators on individual qubits
            observables_x = [
                SparsePauliOp(id[:i] + "X" + id[(i + 1) :]).apply_layout(
                    transpiled_circuit.layout
                )
                for i in range(num_qubits)
            ]
            observables_y = [
                SparsePauliOp(id[:i] + "Y" + id[(i + 1) :]).apply_layout(
                    transpiled_circuit.layout
                )
                for i in range(num_qubits)
            ]
            observables_z = [
                SparsePauliOp(id[:i] + "Z" + id[(i + 1) :]).apply_layout(
                    transpiled_circuit.layout
                )
                for i in range(num_qubits)
            ]

            # We define the primitive unified blocs (PUBs) consisting of
            # the embedding circuit,
            # set of observables and the circuit parameters
            pub_x = (transpiled_circuit, observables_x)
            pub_y = (transpiled_circuit, observables_y)
            pub_z = (transpiled_circuit, observables_z)

            # We define and run the estimator to obtain <X>, <Y> and <Z> on all qubits
            estimator = Estimator(options=options)

            job = estimator.run([pub_x, pub_y, pub_z])
            jobs_test.append(job)
Test data progress: 100%|██████████| 74/74 [00:13<00:00, 5.56it/s]
Ми можемо отримати результати як і раніше.
if run_experiment:
    for i in tqdm.tqdm(
        range(len(test_data)), desc="Retrieving test data results"
    ):
        # Completed job
        job = jobs_test[i]

        # Job results
        job_result_x = job.result()[0].data.evs
        job_result_y = job.result()[1].data.evs
        job_result_z = job.result()[2].data.evs

        # Record <X>, <Y> and <Z> on all qubits for the current datapoint
        projections_test.append([job_result_x, job_result_y, job_result_z])
Крок 4: Постобробка та повернення результату в бажаному класичному форматі
Визначення проєктованого квантового ядра
Проєктоване квантове ядро визначається наступною функцією ядра:
У наведеному вище рівнянні є налаштовуваним гіперпараметром. є елементами матриці ядра .
Використовуючи визначення 1-RDM, ми можемо побачити, що окремі члени в функції ядра можуть бути обчислені як , де . Ці очікувані значення є саме тим, що ми виміряли вище.
Використовуючи scikit-learn, ми можемо фактично обчислити ядро ще простіше. Це можливо завдяки легкодоступній функції радіальних базисних функцій ('rbf') ядра: . Спочатку нам просто потрібно змінити форму нових проєктованих навчальних і тестових наборів даних у двовимірні масиви.
Зверни увагу, що обробка всього набору даних може зайняти близько 80 хвилин на QPU. Щоб переконатися, що решта посібника легко виконується, ми додатково надаємо проєкції з раніше виконаного експерименту (які включені у файли, що ти завантажив в блоці коду Download dataset). Якщо ти виконував навчання самостійно, ти можеш продовжити посібник зі своїми власними результатами.
if run_experiment:
    projections_train = np.array(projections_train).reshape(
        len(projections_train), -1
    )
    projections_test = np.array(projections_test).reshape(
        len(projections_test), -1
    )
else:
    projections_train = np.loadtxt("projections_train.txt")
    projections_test = np.loadtxt("projections_test.txt")
Метод опорних векторів (SVM)
Тепер ми можемо запустити класичний SVM на цьому попередньо обчисленому ядрі та використати ядро між тестовими і навчальними наборами для прогнозування.
# Range of 'C' and 'gamma' values as SVC hyperparameters
C_range = [0.001, 0.005, 0.007]
C_range.extend([x * 0.01 for x in range(1, 11)])
C_range.extend([x * 0.25 for x in range(1, 60)])
C_range.extend(
    [
        20,
        50,
        100,
        200,
        500,
        700,
        1000,
        1100,
        1200,
        1300,
        1400,
        1500,
        1700,
        2000,
    ]
)

gamma_range = ["auto", "scale", 0.001, 0.005, 0.007]
gamma_range.extend([x * 0.01 for x in range(1, 11)])
gamma_range.extend([x * 0.25 for x in range(1, 60)])
gamma_range.extend([20, 50, 100])

param_grid = dict(C=C_range, gamma=gamma_range)

# Support vector classifier
svc = SVC(kernel="rbf")

# Define the cross validation
cv = StratifiedKFold(n_splits=10)

# Grid search for hyperparameter tuning (q: quantum)
grid_search_q = GridSearchCV(
    svc, param_grid, cv=cv, verbose=1, n_jobs=-1, scoring="f1_weighted"
)
grid_search_q.fit(projections_train, train_labels)

# Best model with best parameters
best_svc_q = grid_search_q.best_estimator_
print(
    f"The best parameters are {grid_search_q.best_params_} with a score of {grid_search_q.best_score_:.4f}"
)

# Test accuracy
accuracy_q = best_svc_q.score(projections_test, test_labels)
print(f"Test accuracy with best model: {accuracy_q:.4f}")
Fitting 10 folds for each of 6622 candidates, totalling 66220 fits
The best parameters are {'C': 8.5, 'gamma': 0.01} with a score of 0.6980
Test accuracy with best model: 0.8108
Класичне порівняльне тестування
Ми можемо запустити класичний SVM з функцією радіальних базисних функцій як ядром без виконання квантової проєкції. Цей результат є нашим класичним еталоном.
# Support vector classifier
svc = SVC(kernel="rbf")

# Grid search for hyperparameter tuning (c: classical)
grid_search_c = GridSearchCV(
    svc, param_grid, cv=cv, verbose=1, n_jobs=-1, scoring="f1_weighted"
)
grid_search_c.fit(train_data, train_labels)

# Best model with best parameters
best_svc_c = grid_search_c.best_estimator_
print(
    f"The best parameters are {grid_search_c.best_params_} with a score of {grid_search_c.best_score_:.4f}"
)

# Test accuracy
accuracy_c = best_svc_c.score(test_data, test_labels)
print(f"Test accuracy with best model: {accuracy_c:.4f}")
Fitting 10 folds for each of 6622 candidates, totalling 66220 fits
The best parameters are {'C': 10.75, 'gamma': 0.04} with a score of 0.7830
Test accuracy with best model: 0.7432
Додаток: Перевірка потенційної квантової переваги набору даних у задачах навчання
Не всі набори даних пропонують потенційну перевагу від використання PQK. Існують деякі теоретичні межі, які можна використовувати як попередній тест, щоб перевірити, чи може певний набір даних отримати вигоду від PQK. Щоб кількісно визначити це, автори статті Power of data in quantum machine learning [2] визначають величини, які називаються класичною та квантовою складністю моделі, а також геометричним розділенням класичних і квантових моделей. Щоб очікувати потенційної квантової переваги від PQK, геометричне розділення між класичними та квантово-проєктованими ядрами повинно бути приблизно на порядку , де — це кількість навчальних зразків. Якщо ця умова виконується, ми переходимо до перевірки складності моделей. Якщо класична складність моделі має порядок , тоді як квантово-проєктована складність моделі істотно менша за , ми можемо очікувати потенційної переваги від PQK. Геометричне розділення визначається наступним чином (F19 у [2]):
# Gamma values used in best models above
gamma_c = grid_search_c.best_params_["gamma"]
gamma_q = grid_search_q.best_params_["gamma"]

# Regularization parameter used in the best classical model above
C_c = grid_search_c.best_params_["C"]
l_c = 1 / C_c

# Classical and quantum kernels used above
K_c = rbf_kernel(train_data, train_data, gamma=gamma_c)
K_q = rbf_kernel(projections_train, projections_train, gamma=gamma_q)

# Intermediate matrices in the equation
K_c_sqrt = sqrtm(K_c)
K_q_sqrt = sqrtm(K_q)
K_c_inv = inv(K_c + l_c * np.eye(K_c.shape[0]))
K_multiplication = (
    K_q_sqrt @ K_c_sqrt @ K_c_inv @ K_c_inv @ K_c_sqrt @ K_q_sqrt
)

# Geometric separation
norm = np.linalg.norm(K_multiplication, ord=np.inf)
g_cq = np.sqrt(norm)
print(
    f"Geometric separation between classical and quantum kernels is {g_cq:.4f}"
)

print(np.sqrt(len(train_data)))
Geometric separation between classical and quantum kernels is 1.5440
13.114877048604
Складність моделі визначається наступним чином (M1 у [2]):
# Model complexity of the classical kernel

# Number of training data
N = len(train_data)

# Predicted labels
pred_labels = best_svc_c.predict(train_data)
pred_matrix = np.outer(pred_labels, pred_labels)

# Intermediate terms
K_c_inv = inv(K_c + l_c * np.eye(K_c.shape[0]))

# First term
first_sum = np.sum((K_c_inv @ K_c_inv) * pred_matrix)
first_term = l_c * np.sqrt(first_sum / N)

# Second term
second_sum = np.sum((K_c_inv @ K_c @ K_c_inv) * pred_matrix)
second_term = np.sqrt(second_sum / N)

# Model complexity
s_c = first_term + second_term
print(f"Classical model complexity is {s_c:.4f}")
Classical model complexity is 1.3578
# Model complexity of the projected quantum kernel

# Number of training data
N = len(projections_train)

# Predicted labels
pred_labels = best_svc_q.predict(projections_train)
pred_matrix = np.outer(pred_labels, pred_labels)

# Regularization parameter used in the best classical model above
C_q = grid_search_q.best_params_["C"]
l_q = 1 / C_q

# Intermediate terms
K_q_inv = inv(K_q + l_q * np.eye(K_q.shape[0]))

# First term
first_sum = np.sum((K_q_inv @ K_q_inv) * pred_matrix)
first_term = l_q * np.sqrt(first_sum / N)

# Second term
second_sum = np.sum((K_q_inv @ K_q @ K_q_inv) * pred_matrix)
second_term = np.sqrt(second_sum / N)

# Model complexity
s_q = first_term + second_term
print(f"Quantum model complexity is {s_q:.4f}")
Quantum model complexity is 1.5806
Наступні кроки
Якщо ця робота видалася тобі цікавою, тебе може зацікавити такий матеріал:
- Поглиблений курс з квантового машинного навчання від IBM Quantum Learning
- Навчальний посібник Quantum kernel training
Посилання
- Utro, Filippo, et al. "Enhanced Prediction of CAR T-Cell Cytotoxicity with Quantum-Kernel Methods." arXiv preprint arXiv:2507.22710 (2025).
- Huang, Hsin-Yuan, et al. "Power of data in quantum machine learning." Nature communications 12.1 (2021): 2631.
- Daniels, Kyle G., et al. "Decoding CAR T cell phenotype using combinatorial signaling motif libraries and machine learning." Science 378.6625 (2022): 1194-1200.